You improve thermal scope performance fastest when you set focus correctly, run FFC when the image starts to drift, and adjust image settings for the air, ground, and background in front of you. The best order is simple: set the diopter first, focus for distance next, recalibrate after that, then tune brightness, contrast, and palette.
In this guide, we’ll walk through each step so you can get a cleaner image for scanning, identification, and aiming in real field conditions.
Table of Contents
What does “better thermal scope performance” actually mean?
Better thermal scope performance means you can detect heat faster, separate the target from the background more clearly, and keep enough detail to identify what you are looking at at real working distances.
Detection only tells you that something is there. Good performance also helps you separate that target from grass, brush, rocks, or warm ground and read enough shape detail to make a confident decision.
That is why thermal performance depends on both setup and conditions. Focus, FFC timing, and image settings all matter, but so do humidity, background heat, clutter, and distance. Keep those 3 checks in mind as you go through the rest of this guide: detection, separation, and identification.
Why should you start with focus before changing any settings?
Start with focus because no image setting can bring back detail that bad focus has already blurred. Once the image is clean, you can judge brightness, contrast, and palette changes far more accurately.
Set the Diopter for Your Eye First
Set the diopter first so the reticle and menu look sharp to your eye. Aim at a plain surface, like a blank wall, a dim sky, or a shaded fence line, then adjust until the display text looks crisp. Do this for each shooter, and redo it after changes like new glasses or contact lenses.
Adjust Objective Focus for the Distance You Are Working At
Use objective focus to sharpen the scene itself. Pick a target at a known range, such as 50, 100, or 200 yards, and fine-tune until the edges look clean instead of soft or smeared. Refocus when you move from a close brush to a far tree line, because one focus point will not hold equally well across every distance.
Do Not Mix Up Diopter And Objective Focus
Use one simple rule in the field: the diopter sharpens the display, while objective focus sharpens the target. If the reticle looks crisp but the animal does not, adjust objective focus. If the scene looks sharp but the reticle looks fuzzy, fix the diopter first. That quick check solves a lot of “my settings look off” problems before they waste your time.
How does calibration and FFC improve thermal image quality?
Calibration and FFC improve thermal image quality by reducing sensor noise and restoring a more even image when temperatures shift. A lot of image problems that look like bad contrast or weak sharpness actually start with calibration drift.
FFC Helps Clean Up Sensor Drift
Run FFC when the image starts to look uneven across the screen. Common signs include banding, blotches, or a hazy “dirty glass” look that was not there a few minutes ago. You will often notice this after a major temperature change, like stepping out of a warm truck into cold air.
Recalibrate Before You Judge Brightness or Contrast
Recalibrate before you start chasing settings. If the image has drifted, you may end up over-adjusting contrast or sharpness to compensate for a temporary issue. That usually leaves you with a harsher image later. A better order is simple: focus first, run FFC next, then evaluate the picture.
Use Manual FFC When the Scene Changes Fast
Manual FFC helps most when conditions change quickly, such as light rain, shifting wind, or a move from open ground into thicker cover. If you notice extra shimmer, smearing, or weaker separation between the target and the ground, a manual FFC check is often worth doing. Just do not overuse it during active scanning, or you will keep breaking your rhythm.
Which Image Settings Improve Thermal Scope Performance the Most?
The image settings that improve thermal scope performance the most are brightness, contrast, palette choice, and careful sharpness control. Start there first, because those settings do the most to improve target separation without making the whole screen look noisy.
Adjust Brightness And Contrast Before Anything Else
Set brightness and contrast first because they shape the entire image. Lower the brightness until the background stops glowing more than it should, then raise contrast until the target edges stand out cleanly. If hot areas start blowing out, back off a little. Fence posts, brush lines, and open ground are good reference points when you do this.
Use One Main Palette for the Night
Choose a palette that helps your eyes read the scene for long stretches, not just for a quick glance. White hot is often the easiest place to start for general spotting, black hot can help with edge reading, and red hot can pull your attention toward the hottest parts of the image. Pick one main palette and stay with it unless the terrain changes a lot.
Make Small Changes to Sharpness, Gain, And Scene Mode
Use a light hand with sharpness and gain. A small sharpness increase can help outline animals and terrain features, but too much creates halos and makes the image look fake. Gain can reveal weak heat differences, though it can also add grain when the air is warm and humid. If your scope has scene modes, match them to the cover in front of you instead of leaving one mode on for every hunt.
Treat Digital Zoom As a Confirmation Tool
Use digital zoom after you already have enough detail at native magnification. It can help with confirmation and shot placement, but it does not create new information. It only enlarges what the sensor already captured, so the image often looks larger and softer at the same time. Zoom in when you need it, then go back out for scanning.
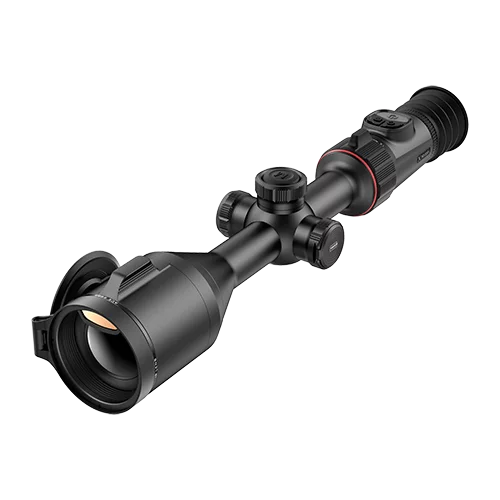
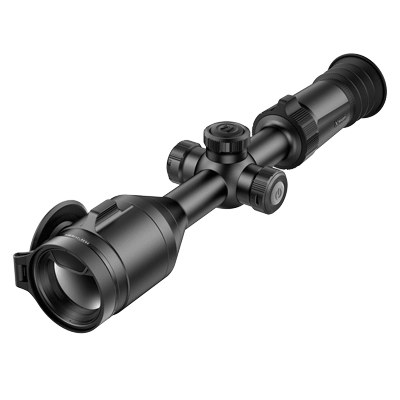
If you want finer zoom control without jumping through fixed steps, the Nocpix RICO 2 thermal riflescope is a natural fit here. Its stepless zoom design gives you tighter control over magnification, which helps when you need a more precise view for confirmation instead of a rough jump in image size.
Why Weather And Background Conditions Change Thermal Performance So Much?
Weather and background conditions change thermal performance because they reduce contrast, soften edges, and fill the scene with competing heat patterns. Even a well-tuned scope will struggle when the air is wet, and the ground is still holding heat.
Moisture in the Air Cuts Clarity Fast
Rain, fog, humidity, and snow all make the image harder to read because moisture weakens the thermal signal before it reaches the scope clearly. You may still detect heat, but you will lose crisp edges and small shape cues sooner, especially at longer ranges. On wet nights, shorter scanning lanes like field edges, trails, and fence gaps usually work better.
Low Contrast Makes Targets Blend Into the Scene
Targets get harder to separate when the animal and the background sit close to the same temperature. This often happens on warm nights, humid evenings, and early mornings when the ground is still releasing stored heat. In those conditions, better focus and a better palette usually help more than cranking sharpness too hard.
Background Clutter Creates False Shapes
Brush, tall grass, rocks, and uneven ground can all produce heat patterns that look almost like body parts at a glance. That is why thermal users sometimes think they saw legs, ears, or a head when they were really reading clutter. Slow your pan speed in messy cover and confirm movement before you trust shape alone.
Distance Makes Every Weakness More Obvious
Poor conditions show up faster as distance increases. A little haze may not ruin the image at 50 yards, but it can wipe out separation much farther out. If you want more reliable identification at range, choose cleaner nights and stronger contrast windows instead of assuming settings alone will save the image.
Before you assume the problem is in the menu, it helps to match what you see with the first thing you should check. This quick table makes that easier in the field.
Thermal Scope Problem Solver: What You See and What to Adjust
| What You See | Likely Cause | What to Check First | What to Adjust |
| The reticle looks sharp, but the target looks soft | Objective focus is off for the working distance | Check target distance and refocus the objective | Refocus for the distance you are actually scanning or aiming at |
| The target looks bigger, but not clearer | Digital zoom enlarges pixels instead of adding detail | Return to native magnification | Use digital zoom only for confirmation or aiming |
| The image looks flat or dull | Low thermal contrast from humidity, warm ground, or background heat | Check focus, palette, and recent weather conditions | Refine focus, try a better palette, and shorten your scanning distance |
| The image shows banding, blotches, or a dirty-glass look | Calibration drift or sensor noise | Run FFC first | Recalibrate before changing brightness, contrast, or sharpness |
| Hot areas look blown out, and the background feels messy | Brightness or contrast is pushed too far | Check brightness and contrast together | Lower brightness first, then raise contrast more carefully |
| Edges look harsh or fake | Sharpness is too high | Check for halos around animals, brush, or fence lines | Reduce sharpness until edges look cleaner and more natural |
| The image looks grainy in warm, humid air | Gain is too aggressive for the conditions | Check gain level and background noise | Lower gain and keep the image cleaner |
| The picture looked fine earlier, then suddenly got worse | Lens moisture, dust, or debris | Inspect the lens before touching the menu | Wipe the lens gently and clear off moisture or dust |
| Targets disappear in brush or uneven ground | Background clutter is hiding shape cues | Check pan speed and scanning lane | Slow down your pan and scan cleaner lanes like trails, edges, or gaps |
| The image shakes too much to judge clearly | Poor stability while scanning or aiming | Check body position, rest, or tripod support | Stabilize the scope before judging detail or taking a shot |
| You can tell something is there, but not what it is | Detection is possible, but the identification detail is not enough | Check distance, zoom level, and hardware limits | Move closer, reduce zoom, or accept that the scope may be at its detail limit |
When do settings help, and when is hardware the real limit?
Settings help when your scope is already capturing enough information and only needs a cleaner presentation. Hardware becomes the real limit when the sensor and lens are not giving you enough detail to work with in the first place.
If you are comparing a thermal rifle scope for better range, stronger identification, and cleaner separation in rough conditions, hardware specs matter more than menu changes.
Lower NETD Helps in Flat, Low-Contrast Conditions
NETD matters most when the scene looks dull and the temperature differences are small. A lower NETD usually helps the scope pick up weaker heat differences, which can improve separation on humid nights, over warm ground, or in light haze. If you often hunt in those conditions, sensitivity is not a side detail. It is a buying factor.
Resolution Limits How Much Detail You Can Actually Read
Resolution affects how much usable detail stays visible at distance. Higher resolution usually gives you cleaner edges, better body shape cues, and a more readable image when you zoom. If the image keeps breaking down when you try to identify at range, you may be looking at a resolution limit instead of a settings problem.
Lens size and focal length affect distance performance
Lens size and focal length affect distance performance because they control optical magnification and how much thermal signal reaches the sensor. Longer focal lengths are usually better for longer-range identification, while wider views make scanning easier in tighter cover. Pick the lens around your terrain instead of assuming one setup fits woods, open ground, and mixed brush equally well.
Settings can improve the image, but not add missing detail
Settings can improve contrast, edge visibility, and workflow, but they cannot create detail that the scope never captured. If a distant target already looks like a soft heat blob on a wet, low-contrast night, menu changes may help you confirm that something is there, but not what it is. Use settings to clean up the image. Use hardware to raise the ceiling.
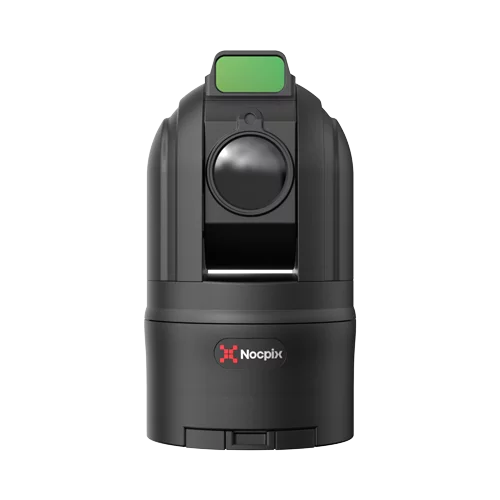
This is also where a stronger riflescope platform can help more than another round of menu changes. For example, the Nocpix ACE thermal riflescope pairs thermal imaging with an integrated LRF and true optical axis alignment, which makes distance confirmation more dependable when you need real shooting data, not just a better-looking screen.
A practical checklist for improving thermal scope performance
Use this thermal scope performance checklist before you scan, identify, or take a shot:
- Set Diopter First: Adjust until the reticle and menu text look sharp to your eye.
- Focus for Distance Next: Tune the objective until the target edges look clean at your working range.
- Run FFC Before Tuning: Recalibrate after major temperature changes or image drift before you judge the picture.
- Adjust Brightness Then Contrast: Calm the background first, then raise target separation without blowing out hot areas.
- Choose One Main Palette: Pick a palette that fits the terrain and stay with it unless conditions change a lot.
- Use Digital Zoom With a Purpose: Zoom in for confirmation or aiming, then return to native view for scanning.
- Check the Lens Before Changing Settings: Wipe off moisture, dust, or debris before assuming the image problem starts in the menu.
- Control Condensation and Debris: Keep the objective covered between scans and clear off droplets or fine debris before they build up.
- Steady the Image Before You Judge It: Use a rest, slow your pan, and let the reticle settle before deciding the image is good enough.
Final Thought
You will get better thermal scope performance when you work in the right order instead of chasing random menu changes. Start with diopter and target focus, run FFC when the image drifts, then adjust brightness, contrast, and palette for the conditions in front of you. Add a clean lens, steadier scanning, and realistic expectations for weather and distance, and the image becomes much easier to trust.
If you are comparing scopes now, explore Nocpix and choose a setup that fits your terrain, range, and identification needs. If you already own one, save the checklist above and run it the next time the image looks flat, soft, or harder to read than it should.
FAQs
How often should I run FFC (Flat Field Correction)?
Run FFC only when you notice image drift, such as banding, blotches, or a hazy look. This typically happens after significant temperature changes (e.g., stepping out of a warm vehicle) or every 10–15 minutes of continuous use in stable conditions. Avoid running it constantly, as it interrupts your scanning rhythm.
Why does my thermal scope still look blurry after I change the settings?
If your thermal scope still looks blurry after setting changes, the problem usually starts with focus, lens moisture, or calibration instead of the menu. Check the diopter first, refocus the objective for distance, inspect the lens, and run FFC before you keep adjusting the image.
Why does my thermal image get worse after I step out of a warm truck?
A fast temperature change can affect image consistency for a short time. When that happens, run FFC first, then recheck focus before changing brightness or contrast.
Why does digital zoom make the image look worse?
Digital zoom makes the image look bigger, but it does not add real detail. If the target already looks soft at native magnification, zooming in usually makes that softness more obvious.
Why does my thermal scope struggle more on warm, humid nights?
Warm, humid nights often reduce thermal contrast, which makes targets blend into the background more easily. In those conditions, refocus carefully, shorten your scanning distance, and switch to White Hot or Black Hot. These steps usually help more than aggressive sharpness settings.