Thermal imaging works best at night only if you understand what the image is actually showing.
Most missed shots, false targets, and unsafe decisions don’t come from bad equipment. They come from misreading thermal images. Heat signatures, refresh rates, NUC calibration, thermal crossover, PID confirmation—these terms explain why animals sometimes disappear, why images suddenly look worse, and why identification fails in certain conditions.
This guide breaks down 100 essential thermal imaging terms for night hunting, explained with real hunting scenarios and field behavior in mind. If you use thermal optics and want to make faster, safer, and more accurate decisions in the dark, this terminology matters.
Table of Contents
Seeing Heat Correctly (Interpreting Thermal Images)
Seeing heat correctly means understanding why animals sometimes stand out clearly on thermal—and why they seem to disappear at other times, even when they’re right in front of you.
Thermal imaging doesn’t show shapes, colors, or details the way daylight optics do. It translates temperature differences into visible contrast. Once you understand how heat signatures, contrast, palettes, and crossover conditions work together, the screen stops feeling unpredictable and starts making sense in real hunting situations.
Heat Signatures and Thermal Contrast
A heat signature is the visible result of temperature difference on a thermal screen—not the outline of an animal itself.
Thermal devices detect infrared (IR) energy, which sits outside the visible light spectrum. Thermal imaging converts that infrared radiation into an image by comparing temperatures across the scene. When hunters say they “see a heat signature,” they’re really seeing how much warmer or cooler something is compared to its surroundings.
Thermal contrast describes the temperature difference between a target and its background. High contrast makes detection easy. Low contrast causes animals to blend in. What defines the visible edges of a target is the temperature gradient—how quickly temperature changes across the image. Strong gradients create sharp outlines. Weak gradients produce soft, vague shapes.
Scenario:
A hog hunter scans a field edge at 9:00 PM. Ground temperature sits at 68°F. Feral hogs, running around 101°F, create strong contrast and appear as bright, well-defined shapes. The same hunter returns at 3:00 PM on a hot August day. Sun-heated ground reaches 95°F. The hogs are still there—but detection becomes dramatically harder because contrast has collapsed.
Misconception: Thermal imaging works the same regardless of time of day.
Reality: Thermal detection depends on temperature difference, not just warm bodies.
If contrast is weak, detection suffers—even with high-end equipment (this is why the same field can look empty at noon and alive after sunset).
Color Palettes and Polarity
A color palette controls how temperature differences are translated for your eyes—it does not change what the sensor detects.
White Hot displays warmer objects as brighter tones and cooler areas as darker shades. Black Hot reverses that relationship, showing warm targets as dark shapes against a lighter background. A hotspot is simply the warmest area within the field of view, usually an animal’s core body temperature.
The underlying thermal data stays the same regardless of palette. What changes is how easily your brain separates targets from clutter. Certain environments benefit from different polarity choices.
Scenario:
A predator hunter scans near a metal barn that absorbed heat all day. In White Hot, the barn creates massive white bloom that overwhelms the image. Switching to Black Hot turns the barn dark, allowing a warm coyote at 40 yards to stand out clearly as a distinct shape.
Misconception: One color palette is objectively better.
Reality: Palette choice depends on terrain, background heat, and visual clutter.
Switching palettes doesn’t improve detection—it improves perception.
Common Image Artifacts Hunters Confuse for “Animals”
Not every bright shape on a thermal screen is alive.
Thermal bloom occurs when an intense heat source creates a bright halo beyond its physical boundaries. Sensor saturation happens when temperatures exceed what the sensor can meaningfully differentiate. Image noise appears as grainy or flickering pixels, especially in lower-quality sensors or difficult conditions.
Scenario:
A hunter scans a property boundary at dusk and spots a bright, deer-sized shape near a fence line. It never moves. After closer inspection, the “animal” turns out to be a steel T-post radiating stored heat and producing thermal bloom.
Misconception: Everything bright on thermal is an animal.
Reality: Retained heat and reflective materials create false targets regularly.
Movement confirmation prevents wasted time and misidentification of stationary heat sources.
Scanning & Detecting Fast (Finding Targets Efficiently)
Finding animals quickly with thermal isn’t about luck or faster panning. It comes down to how you scan, how much ground you cover per second, and whether your eyes have time to process what the sensor is showing
Thermal devices detect heat instantly, but human vision doesn’t. The way you move the image across the screen often matters more than the specs printed on the box.
Scan Patterns and Field Technique
Scanning is the deliberate process of searching terrain for heat signatures, not random movement of the optic.
A sweep is one continuous pan across an area. Done correctly, it’s slow and controlled. A scan pattern gives structure to that movement so sections don’t get skipped or rushed. One of the most effective methods is the sector scan, where the landscape is mentally divided into zones and scanned in sequence.
This structure matters because of scan fatigue. When the image moves too fast or without a pattern, your brain stops distinguishing new heat from background clutter. Detection drops long before you feel tired.
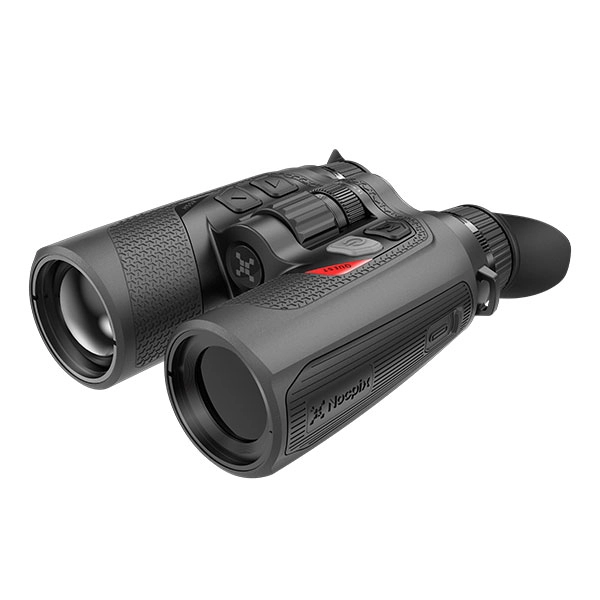
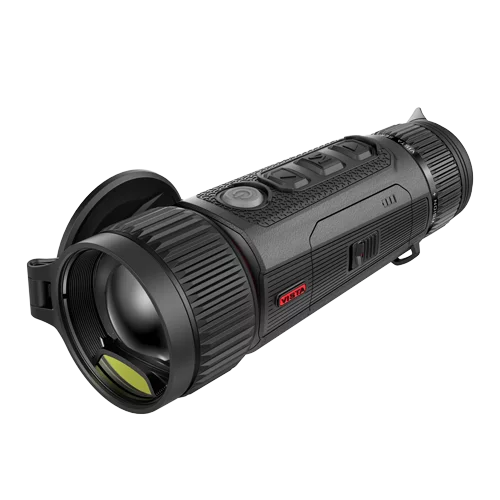
Many hunters rely on thermal monoculars during the initial scan phase because they allow fast, wide-area detection without the fatigue of rifle-mounted optics. By separating detection from confirmation, hunters maintain scanning efficiency while reserving heavier optics for later stages of the workflow.
Fast panning feels productive, but it usually hides small movements. Slow scanning gives your eyes time to register subtle contrast changes that reveal animals just entering the field of view.
Field of View (FOV) vs Magnification
Field of view (FOV) describes how wide an area your thermal optic shows at a given distance. Base magnification is the native optical power of the device before any digital zoom is applied. Optical magnification uses lens elements to enlarge the image while preserving detail.
Wide FOV covers more ground quickly, which makes initial detection easier. Narrow FOV limits coverage but improves detail for assessment. This tradeoff shapes how fast you can actually find targets.
A hunter using a wide-FOV, low-magnification device often detects animals sooner simply because more terrain is visible at once. A higher-magnification optic may provide better identification, but it requires more time to scan the same area.
This is why many hunters scan with lower base magnification, then increase magnification only after detection. Trying to search with high magnification slows coverage and increases the chance of missing movement at the edges of the scene.
Refresh Rate (Hz), Motion Handling, and Smoothness at Night
Refresh rate, measured in Hertz (Hz), describes how often the thermal image updates each second. Lower refresh rates can introduce frame drop, where motion appears to jump, and image lag, where the display trails behind real-world movement.
At longer distances or with stationary targets, refresh rate differences are subtle. At close to medium range with moving animals, they become obvious. Smooth image updates allow the eye to track motion naturally, while stuttering motion forces constant visual reacquisition.
When an animal crosses an opening or moves laterally through brush, higher refresh rates preserve continuous movement. Lower refresh rates still detect the animal, but tracking becomes less intuitive, especially during quick direction changes.
This doesn’t mean lower-Hz devices can’t hunt effectively. It means their limitations show up most clearly when targets move fast and close, where timing and smooth tracking matter.
Detection vs Usable Distance
Detection range is the distance at which a thermal device can indicate that something warm exists. Usable range is the distance at which you can actually interpret what that heat source is well enough to make decisions.
This gap exists because of level of detail (LOD). At long range, you may see a heat signature without enough information to identify species, orientation, or behavior. A wide-area scan prioritizes finding heat first. Identification happens later, at shorter distances or higher magnification.
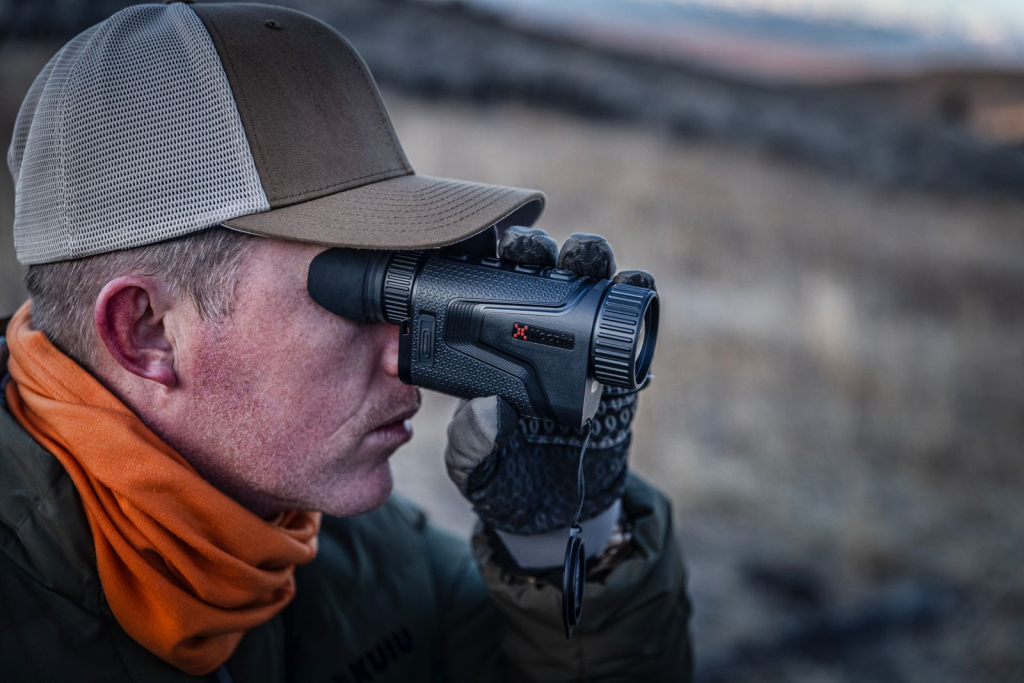
With systems like Nocpix thermal binoculars, it’s common to detect heat well beyond several hundred yards, recognize animal class at mid-range, and reach confident identification only after closing the distance further.
Each distance serves a different purpose—early detection, situational awareness, and final decision-making.
Problems arise when detection distance is treated as decision distance. Thermal excels at finding targets early. Ethical and accurate decisions require closing the gap until usable detail is available.
Understanding this distinction keeps expectations realistic and prevents overconfidence based on marketing range numbers.
PID: Recognition vs Identification (Staying Safe and Accurate)
PID isn’t a feature or a setting. It’s a decision process that determines whether what you’re seeing is safe, legal, and exactly what you think it is.
Thermal imaging excels at finding heat quickly. What it does not do is guarantee correct identification. That gap is where most night-hunting mistakes happen.
The PID Ladder
The PID ladder describes the step-by-step process your brain goes through when interpreting a thermal image. Skipping steps feels fast—but it’s where errors start.
Detection is simply noticing that a heat source exists. At this stage, all you know is that something warm is present.
Recognition is categorizing that heat source into a general class. Four-legged or two-legged. Large or small. Moving with animal-like behavior or not.
Identification is determining exactly what the target is—species, orientation, and whether it meets legal and ethical criteria.
PID (Positive Identification) is the point where recognition and identification agree, and there’s no reasonable doubt left.
PID confirmation is the final check before action, often involving better angle, reduced distance, or a different optic.
With systems like Nocpix Quest thermal binoculars, hunters often complete the first two steps—detection and recognition—at long to mid-range. Confident identification usually happens later, after closing distance or switching tools. That delay isn’t a limitation; it’s how the PID process is meant to work.
False Positives and Target Discrimination (Animals vs People vs Objects)
A false positive occurs when a heat source is mistaken for a valid target. Thermal imaging makes this easier than many hunters expect.
Target discrimination is the ability to tell similar heat signatures apart based on proportion, movement, and context—not brightness alone. This becomes harder in clutter, where multiple heat sources overlap, and especially in background clutter, where terrain features like rocks, livestock, equipment, or buildings retain heat.
In agricultural or semi-rural areas, animals, people, and objects can produce overlapping thermal profiles. A standing person at distance can resemble a deer. A calf bedded down can look like a hog. A warm fence post can register brighter than a moving animal.
Effective discrimination relies on behavior and movement patterns as much as shape. Leg cadence, posture changes, and how a heat source interacts with terrain often reveal more than size alone. When uncertainty remains, the correct move is not refinement—it’s confirmation.
Why Thermal Doesn’t Show Details
Thermal imaging sacrifices visual detail to gain detection ability.
Sensor resolution determines how much thermal information is captured. Display resolution only determines how that information is shown. Increasing display pixels doesn’t create new detail if the sensor never captured it.
Digital zoom magnifies existing pixels rather than adding information. Push it too far and pixelation replaces usable detail, especially at longer distances.
This is why identification rarely improves by zooming harder from far away. Reducing distance increases the amount of real information reaching the sensor. No amount of digital magnification can substitute for that.
Understanding this limitation prevents overconfidence. If the image doesn’t contain enough detail to identify the target, the correct response is changing position or tools—not forcing clarity that isn’t there.
When You Should Switch Tools or Change Tactics to Confirm
Thermal is unmatched for detection, but confirmation often requires a different approach.
Image fusion (also called thermal fusion) overlays thermal data with visible or night-vision imagery, restoring context that thermal alone removes.
Picture-in-Picture (PiP) allows localized magnification without losing situational awareness across the full field of view.
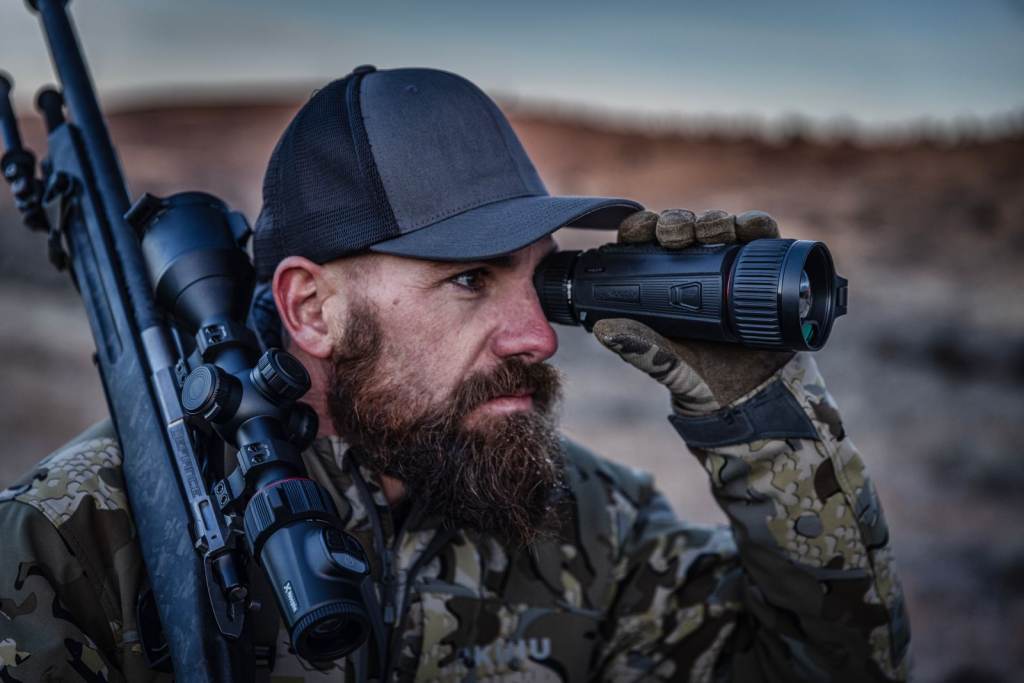
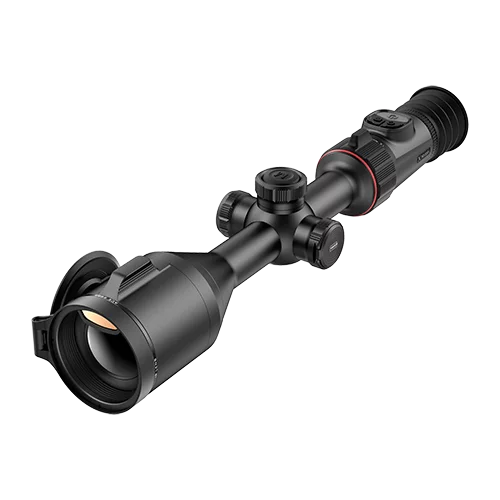
A common and effective workflow is scanning with thermal binoculars, narrowing down candidates through recognition, then switching to a thermal rifle scope or a digital night vision scope for final confirmation. Each tool handles a different step of the PID ladder.
This isn’t redundancy. It’s division of labor. Thermal finds heat. Other optics confirm identity. Safe decisions happen when each tool is used where it performs best.
Distance & Decision-Making at Night (Judging Range and Taking Action)
Thermal imaging makes detection easier—but it makes distance judgment harder.
At night, most shooting mistakes aren’t caused by missing targets. They’re caused by misjudging how far away something actually is and what lies beyond it.
Understanding how thermal changes distance perception is essential for making correct shot or no-shot decisions.
Why Distance Judgment Feels Different
Distance judgment is your ability to estimate how far away a target is. With thermal, this skill feels unreliable because the visual cues your brain normally uses are missing.
In daylight, humans rely on depth cues—shadows, texture gradients, perspective, and atmospheric haze. Thermal removes nearly all of these. What remains is apparent size, which is how large a heat signature looks on the screen.
Apparent size is deceptive. A small animal nearby can appear similar to a larger animal farther away. Without reference points, your brain fills in gaps using assumption rather than measurement.
This is why even experienced hunters routinely underestimate distance through thermal optics. The image feels flat, detached from the environment, and stripped of scale.
Recognizing this limitation isn’t a weakness. It’s the first step toward correcting for it.
Range Estimation Methods
Range estimation means judging distance based on known reference points, not visual guesswork.
The most reliable method is known distance. This means identifying landmarks before dark and memorizing their measured distances. Fence posts, tree lines, terrain breaks, and buildings become fixed reference points once night falls.
Unknown distance estimation happens when no reference exists. This is inherently less accurate and should trigger caution rather than confidence.
Range landmarks bridge the gap. By anchoring thermal observations to features with known distances, you regain scale. A heat signature near a fence corner you know is 200 yards away immediately gains context. A floating heat source in open ground does not.
This is why many disciplined hunters do range prep during daylight. Thermal works best when it’s paired with prior knowledge of the terrain.
Laser Rangefinder Terms and Misunderstandings
A Laser Range Finder (LRF) calculates distance by measuring how long a laser pulse takes to reflect back from whatever it strikes.
Laser rangefinder distance and laser distance both refer to that measurement—but neither guarantees the laser hit your intended target.
The laser measures what it contacts, not what you’re looking at. If the beam strikes brush, fence wire, or a tree just in front of or behind the target, the distance reading reflects that object instead.
This becomes critical at night, where depth perception is already compromised. A correct-looking number can still be wrong.
LRFs are powerful tools when used deliberately. They are not automatic truth machines. Confirming what the laser actually hit is just as important as reading the number on the screen.
Ethical Decision Terms (Shot / No-Shot Logic)
Distance alone never determines whether a shot is acceptable. Context does.
A backstop is whatever will safely stop a projectile if it passes through or misses the target. Thermal imaging does not show fences, buildings, or terrain features that lack heat contrast.
A safe sector of fire is the area where a shot can be taken without endangering people, livestock, or property beyond the target.
A no-shot condition exists any time the backstop is uncertain, the target cannot be positively identified, or movement could place non-targets behind the animal.
An ethical shot requires all of these conditions to be satisfied simultaneously: confirmed identity, known distance, and a verified safe background.
Thermal detection can make targets feel isolated. In reality, they exist within a wider environment that thermal cannot fully reveal. Deliberate scanning beyond the target—before acting—is what keeps decisions ethical and safe.
Setup & Control (Zero, Focus, and On-the-Fly Adjustments)
Thermal image quality lives or dies on setup.
Most complaints about “blurry,” “muddy,” or “washed-out” images don’t come from bad hardware—they come from settings that don’t match the user, the distance, or the environment.
Once you understand what each control actually affects, adjusting a thermal device becomes quick, intuitive, and repeatable in the field.
Focus, Diopter, and Sharpness
Focus is not a single adjustment. It’s the result of two different systems working together.
Focus type refers to how a thermal optic achieves clarity. Most hunting thermals rely on manual focus, which allows precise control across different distances. The focus ring adjusts sharpness based on target distance, not eyesight.
Diopter adjustment compensates for your individual vision. It affects how clearly your eye sees the display itself—not the scene. If the diopter is wrong, no amount of focus-ring adjustment will produce a sharp image.
A common mistake is adjusting the focus ring to fix a diopter issue. This leads to a never-ending cycle of “almost sharp” images that fall apart at different distances.
The correct order is simple:
Set the diopter once for your eye. Then use the focus ring continuously as distance changes. When this order is reversed, the image never truly snaps into focus.
NUC / Shutter Calibration
Thermal sensors drift over time. Shutter calibration, also known as Non-Uniformity Correction (NUC), corrects that drift.
During NUC, an internal shutter briefly blocks the sensor so the system can recalibrate pixel response. The momentary freeze or click you hear isn’t a malfunction—it’s maintenance.
As you scan, especially through changing temperatures or after extended use, subtle image artifacts can appear: faint streaking, uneven brightness, or isolated hot pixels. Triggering NUC realigns the sensor and restores image uniformity.
Frequent NUC does not damage a device. Avoiding it does degrade image quality. Understanding this turns NUC from a confusing interruption into a routine, intentional action—especially before critical identification moments.
AGC, Gain, and Image Tuning
Automatic Gain Control (AGC) manages how the device maps temperature differences into visible contrast. It works well in average conditions, but no algorithm anticipates every environment.
Gain controls how strongly temperature differences are amplified. Higher gain reveals subtle contrast but increases noise. Lower gain reduces noise but can hide detail.
Brightness affects how light or dark the display appears overall. Contrast controls how distinct warm and cool areas appear relative to each other.
Many devices apply an image enhancement algorithm to optimize these settings automatically. These systems are helpful—but they make assumptions.
When moving from open ground into timber, from dry fields into humid brush, or from cold nights into thermal crossover conditions, manual adjustments often outperform automatic ones. Knowing which control to touch—and why—is what separates usable images from frustrating ones.
Digital Zoom vs Optical Magnification
Optical magnification uses lens elements to gather more thermal information. Digital zoom enlarges existing pixels without adding detail.
This distinction matters. Digital zoom can make a target larger on screen while simultaneously making it less identifiable.
Picture-in-Picture (PiP) mode offers a compromise by magnifying only a portion of the image, preserving situational awareness in the wider field of view.
Wide Dynamic Range (WDR) helps the sensor handle scenes with extreme temperature differences, preventing hot objects from overwhelming the image. Digital Noise Reduction (DNR) smooths grainy images but can soften fine detail if pushed too far.
These tools are best used deliberately. Optical magnification and physical distance add information. Digital tools rearrange what already exists. When identification matters, clarity comes from real detail—not bigger pixels.
Performance Limits & Environment (What Changes Results in the Real World)
Thermal imaging performance doesn’t exist in a vacuum.
Two nights with the same device can produce very different results—not because anything is wrong, but because the environment changed.
Understanding where thermal optics naturally struggle prevents misdiagnosing normal limitations as equipment failure.
Weather and Conditions
Environmental conditions affect how infrared energy travels before it ever reaches the sensor.
Humidity absorbs and scatters infrared radiation. As humidity rises, effective detection range drops and contrast softens. High-humidity nights often produce images that look flatter and less defined, even with proper settings.
Fog is worse. Dense fog blocks thermal radiation entirely, creating heavy attenuation that no amount of zoom or gain can fix. Targets may appear abruptly and disappear just as quickly.
Rain introduces two problems at once. Falling rain cools surfaces unevenly, reducing contrast, and moisture on the lens degrades image clarity. Light rain is manageable. Sustained rainfall significantly limits performance.
Operating temperature defines the range in which a device functions reliably. Extreme cold can reduce battery efficiency and slow response time. Extreme heat increases sensor noise and accelerates thermal crossover effects.
None of these conditions mean thermal “isn’t working.” They mean infrared energy is being disrupted before it reaches the optic.
Specs vs Real Detail
Specifications describe potential—not guaranteed field results.
Sensor resolution determines how much thermal information is captured. Display resolution determines how that information is presented to your eyes. A high-resolution display cannot recover detail that a lower-resolution sensor never recorded.
Pixel pitch measures the spacing between thermal sensor elements. Smaller pitch allows more detail to be captured at the same resolution, especially at longer distances.
Lens aperture, expressed as an F-number, controls how much infrared energy reaches the sensor. A lower F-number allows more radiation in, improving sensitivity and image quality—particularly in low-contrast conditions.
This is why two devices with similar headline specs can perform very differently in the field. The sensor, lens, and processing pipeline work as a system. Real detail comes from how those parts interact, not from any single number on a spec sheet.
Sensitivity and Clarity in the Field
Thermal sensitivity describes how well a device detects small temperature differences. This is quantified by Noise Equivalent Temperature Difference (NETD).
Lower NETD values mean the sensor can distinguish finer temperature variations. This becomes most obvious during low-contrast situations—early evening, humid nights, or thermal crossover periods.
When NETD is high, animals appear as vague blobs that merge with the background. When NETD is low, subtle temperature gradients reveal body shape, posture, and movement.
NETD directly affects how usable an image is when conditions are less than ideal. That’s why sensitivity often matters more than maximum detection range once the sun goes down.
Power and Reliability
Performance isn’t only about image quality. It’s also about whether the device works when you need it.
Battery life determines how long you can scan, observe, and recover without interruption. Cold weather shortens runtime. WiFi streaming and recording increase power draw.
Recoil resistance matters for any rifle-mounted device. Ratings indicate whether a unit can withstand repeated shock from specific cartridge classes—not just whether it can survive being fired once.
Ingress Protection (IP rating) indicates resistance to dust and water. A higher rating doesn’t mean waterproof under all conditions, but it does signal how well a device tolerates rain, humidity, and field exposure.
On-device storage allows recording without external equipment. WiFi streaming enables live viewing on mobile devices but introduces power consumption and potential connection instability.
Reliability isn’t about features—it’s about predictability. A device that performs consistently in your environment is more valuable than one that excels on paper but struggles in real conditions.
Recovery & Tracking with Thermal (After the Shot / After the Spot)
Thermal imaging doesn’t stop being useful once the shot is taken—or once a target disappears into cover.
In many cases, thermal becomes more valuable after the shot than before it. Knowing how heat behaves in those moments dramatically increases recovery success and prevents lost animals.
Thermal Confirmation and Cues
Thermal confirmation is using heat signatures to verify what happened immediately after the shot.
A successful hit often produces visible hit reaction, also called thermal cueing. This can include a sudden flinch, collapse, altered gait, or a brief flash of heat at the impact point caused by tissue disruption and increased blood flow.
Thermal allows you to stay on the animal visually during those first critical seconds. Even when the animal runs, changes in movement pattern often reveal more than the shot itself. A strong hit looks different from a superficial one, and thermal makes that difference easier to observe in real time.
Confirmation doesn’t mean instant certainty—but it provides information that guides your next decision: wait, follow, or reposition.
Heat Retention, Fade, and Timing
After an animal goes down, heat behavior changes rapidly.
Heat retention refers to how long a body remains warmer than its surroundings after death. This window varies based on animal size, ambient temperature, and ground conditions.
Thermal fade is the gradual loss of contrast as the body cools toward ambient temperature. In warm weather, this process accelerates. In cooler conditions, heat signatures remain visible much longer.
Thermal washout occurs when the body temperature matches the environment closely enough that the animal becomes nearly invisible to thermal imaging.
Timing matters. Beginning recovery too late can turn a clearly visible target into a faint or nonexistent signature. Beginning too early—without allowing enough time for the animal to expire—can push a wounded animal farther.
Effective recovery balances ethical wait times with thermal reality. Thermal works best when used deliberately, not delayed indefinitely.
Secondary Scan Technique
A secondary scan is the systematic thermal search performed after initial contact is lost—whether after a shot or after visual contact breaks.
Instead of chasing blindly, secondary scanning expands outward in controlled arcs or sectors, prioritizing likely travel paths such as fence lines, brush edges, creeks, or terrain dips.
Target handoff occurs when visual responsibility shifts—from shooter to spotter, or from one device to another. Clear handoff prevents duplicated effort and missed heat signatures.
Secondary scanning isn’t random. It’s structured. Slow, overlapping coverage catches stationary or fading heat signatures that fast movement would skip entirely.
Many animals are recovered not where they fell—but where scanning resumed methodically.
Team Communication During Recovery
Thermal recovery improves dramatically when roles are defined.
Overwatch means one hunter maintains a fixed position with thermal optics, scanning ahead and beyond while others move on foot. This prevents surprises and keeps eyes on the broader environment.
A sector scan with verbal callouts divides responsibility. One person scans left, another right, another far. Clear communication—distance, direction, movement—turns individual effort into coordinated recovery.
Simple callouts like “heat, stationary, 40 yards, two o’clock” reduce confusion and speed convergence. Without structure, multiple thermal devices often duplicate effort rather than multiply effectiveness. Team recovery works best when communication plans exist before the shot—not after.
Closing Thoughts
Thermal imaging isn’t just about seeing heat—it’s about understanding how that information behaves in real hunting conditions.
The difference between simply owning thermal equipment and using it effectively comes down to interpretation: how you scan, how you confirm identity, how you judge distance, and how you respond when conditions work against you. Missed opportunities and recovery failures usually come from misunderstanding those limits—not from the technology itself.
Hunters who understand concepts like thermal crossover, PID confirmation, and heat fade make better decisions because they know when thermal helps, when it misleads, and when to change tactics. That knowledge—not just better hardware—is what consistently leads to safer shots and more reliable recoveries.
Explore how modern thermal platforms—such as Nocpix—are designed around real hunting workflows, from early detection to final confirmation.
FAQs
Why does my thermal image sometimes look worse even though the specs are good?
Because thermal performance depends heavily on environmental conditions and how the device is set up—not just on specifications. High humidity, thermal crossover, incorrect focus, or improper gain settings can all reduce clarity even on high-end devices. In many cases, adjusting technique or timing improves results more than changing equipment.
Should I always increase digital zoom to identify a target more clearly?
No. Digital zoom enlarges existing pixels without adding detail. If identification isn’t possible at your current distance, closing the distance or switching to a confirmation optic is usually more effective than increasing zoom. Overusing digital zoom often reduces usable detail rather than improving it.
How do I know when thermal alone isn’t enough to confirm a target?
If you cannot confidently determine species, orientation, or what lies beyond the target, thermal alone isn’t sufficient. Thermal excels at detection, but confirmation often requires closing distance, changing angle, or switching to another optic such as digital night vision for visual context.
Do I need multiple thermal devices for effective night hunting?
Not necessarily, but many experienced hunters use different tools for different steps. Handheld thermals are efficient for detection, while rifle-mounted optics and night vision tools are often used for confirmation. The goal isn’t owning more gear—it’s matching tools to the task.
Can thermal imaging replace visual confirmation for ethical shots?
No. Thermal imaging does not show fences, buildings, or non-thermal hazards. Ethical shots require positive identification and a verified safe background, which often means confirming through additional optics or repositioning before taking action.