Choosing thermal scope mounts is mostly a compatibility job. The mount has to fit the rifle, match the optic, place the display where your eye can use it, and stay stable after recoil, transport, and field handling.
That sounds simple until you start comparing rails, rings, quick-detach levers, cantilever mounts, proprietary shoes, and clip-on adapters. A standard-looking mount can still be wrong if the rail spacing, height, eye relief, battery access, or optic interface does not line up.
Use this guide as a pre-purchase checklist. Before buying a thermal scope mounting system, confirm the rifle-side interface, the scope-side interface, the mounting position, the height, and the post-install zeroing process.
What Should You Check Before Buying Thermal Scope Mounts?
Before buying thermal scope mounts, check five things first: the rifle rail or base, the optic’s mounting interface, the mount style, the viewing position, and the way the setup will be verified after installation. If any one of those does not match, the mount may fit on paper but fail in real use.
The easiest way to avoid a bad buy is to collect the following details before adding anything to the cart.
| Check | What to confirm | Why it affects the setup |
|---|---|---|
| Rifle rail or base | Picatinny, Weaver, dovetail, drilled/tapped base, or model-specific rail | The mount must clamp to the rifle correctly. |
| Scope mounting interface | Integrated base, tube body, mounting shoe, or supplied adapter | Not every thermal scope uses rings. |
| Mount style | Fixed, QD, cantilever, one-piece, rings, or model-specific hardware | The style affects removal, balance, and repeatability. |
| Mount height | Height over rail and cheek position | The display should line up with your eye without forcing your head up or down. |
| Eye relief | Distance from eye to eyepiece | Recoil safety and viewing comfort both depend on it. |
| Clearance | Objective, eyepiece, battery door, ports, bolt handle, and controls | A mount can block parts you need in the field. |
| Recoil support | Mount rating, clamp surface, hardware quality, and correct tightening | A shifting mount changes the point of impact. |
| Zero plan | First zero, confirmation groups, and recheck schedule | The setup is not finished until zero is confirmed. |
If you are comparing Nocpix accessory options, the Supports et matériel page is a useful starting point, but the same rule still applies: match the exact optic, rifle, region, and use case before buying.
One more buyer tip: do not assume the included mount, if one is included, is the only workable setup. It may be the right answer, but the rifle stock, rail space, shooting position, and eye relief still need to be checked as a complete system.
How Do Thermal Scope Mounting Systems Differ?
Thermal scope mounting systems differ because thermal optics are not built around one universal body style. Some attach like a traditional riflescope. Some use a one-piece Picatinny mount. Some use a shoe or rail section built for that model. Clip-on thermal attachments follow a different path because they sit in front of a day optic instead of replacing it.
Picatinny and Weaver rail mounts
Picatinny is the most common rail style for modern rifle-mounted thermal optics. It uses standardized slot spacing, which helps mounts clamp in a repeatable position. Many AR-style rifles and modern bolt-action setups use Picatinny rails.
Weaver rails look similar, but the slots are often narrower and less standardized. Some mounts will fit both Picatinny and Weaver. Others will not. The risky assumption is that “rail mount” means automatic cross-fit.
Before ordering a thermal scope rail mount, check the mount manufacturer’s listed rail type. If the mount is made for Picatinny only, do not force it onto a Weaver base just because it looks close.
One-piece, cantilever, and QD mounts
One-piece mounts connect the optic to the rail through a single mount body. They can be sturdy and easy to align because the mount is built as one unit. For many dedicated thermal rifles, a fixed one-piece mount is the cleanest setup.
Cantilever mounts push the optic forward. They are common on AR-style rifles, where rail space and eye position can be tight. A cantilever layout can help place the eyepiece at a better distance, but it also changes the weight distribution.
QD mounts use levers or quick-release hardware, so the optic can be removed faster. They are useful when one optic moves between rifles, when the rifle has to fit in a case, or when the shooter wants to remove the optic after a hunt. A QD mount still has to be checked. Fast removal does not mean perfect return to zero every time.
Thermal scope rings and tube-mounted optics
Thermal scope rings only apply when the optic is designed with a tube body that can be held by rings. Many traditional daytime scopes use 30mm or 34mm rings, but thermal scopes vary much more.
Some thermal optics have a tube-like profile. Others have a block-style body, an integrated base, or a model-specific rail. If a product page does not list a tube diameter, do not guess. Ask for the correct mount interface.
Rings also need the right height. A low ring set may look neat, but it can place the eyepiece too low for a thermal display or block access to controls. A high ring set may solve clearance, but hurt cheek weld.
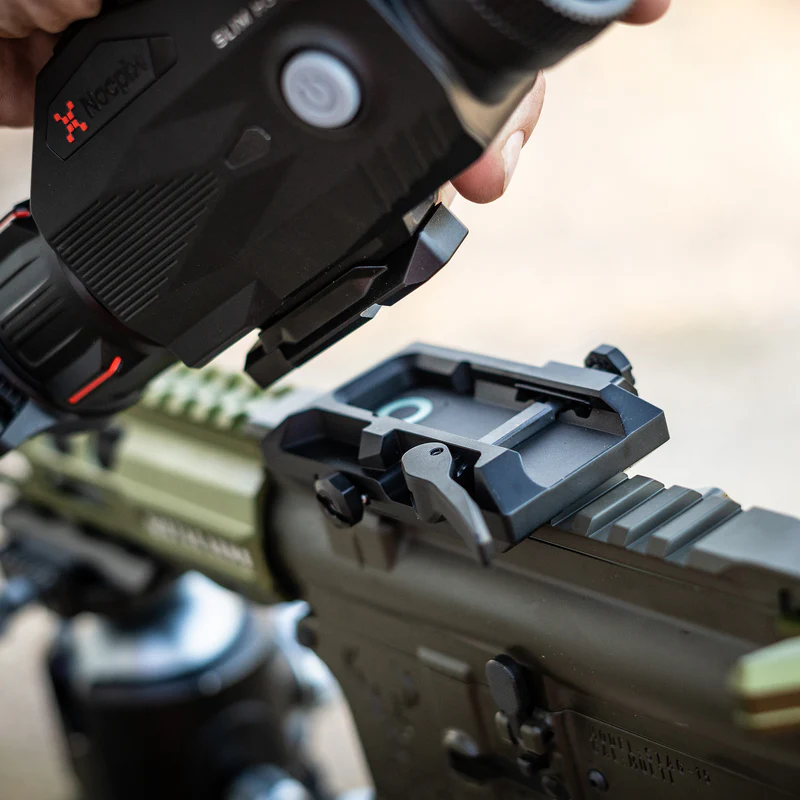
Proprietary mounting shoes and model-specific mounts
Some thermal scope mounts use a proprietary shoe, saddle, or adapter built around a specific optic body. This can make the setup clean and secure, but it also means the mount may not transfer to another model.
Model-specific hardware is not a weakness by itself. It can be the best choice when the optic was designed around it. The tradeoff is that the buyer needs to check the exact model name, generation, and regional version.
This matters because thermal product pages sometimes note regional differences. For example, the Nocpix SLIM page notes that the product shown is the US version and that the mount or product features may differ by country or region. That kind of note is a signal to confirm details with a local dealer before buying hardware.
Clip-on thermal attachments are a different setup
Clip-on thermal attachments do not mount like a thermal riflescope. A clip-on sits in front of a daytime optic, so the mount has to support alignment between the rifle, clip-on, and day scope.
That setup raises different questions:
- Is there enough rail space in front of the day optic?
- Does the clip-on line up with the optical axis?
- Does the day scope magnification work well with the attachment?
- Can the shooter remove the clip-on without disturbing the main optic?
If the device is a clip-on, shop for a clip-on mounting solution, not a thermal scope ring set.
How Do You Check Rifle and Thermal Scope Compatibility?
Thermal scope mount compatibility starts with the rifle and ends with the shooter. The hardware can be technically correct, yet still feel wrong if the eye position, rail space, or control access does not work.
Start with the rifle rail or base
Identify the rifle’s mounting surface first. On an AR-style rifle, this is usually a Picatinny top rail. On a bolt-action rifle, it may be a Picatinny rail, a Weaver-style base, or separate bases installed on the receiver.
Check these details:
- The rail type.
- The length of usable rail.
- Whether the rail is level and properly installed.
- Whether the rail has enough slots for the mount.
- Whether the rail or base is rated for the rifle’s recoil.
A thermal optic can be heavier than a basic day optic, especially if it has a large objective lens, an integrated laser rangefinder, a battery system, and a metal housing. The mount and base need to support that weight under recoil.
Match the optic interface before choosing hardware
Next, check the optic itself. Thermal scopes are often grouped under one category, but their mounting interfaces can differ widely. Some lunettes de visée thermiques use integrated mounting systems, while others may require specific rails, shoes, or rings.
Look for:
- Tube diameter, if rings are supported.
- Integrated Picatinny base or mounting foot.
- Supplied mount or recommended mount.
- Model-specific adapter requirements.
- Any regional compatibility notes?
If a product page only says “mount included” without details, do not assume it fits every rifle. Confirm the rifle rail type and ask the dealer or manufacturer which mount is included for your region.
Check rail length and mounting position
Rail length determines where the optic can sit. This is easy to overlook because thermal scopes often have screens, eyepieces, battery compartments, and control buttons in different places than a day scope.
Before buying, check where the mount’s clamp points land on the rail. Then check whether that position lets the eyepiece sit at a usable distance from your eye.
On AR-style rifles, a cantilever mount may help move the optic forward. On bolt-action rifles, the receiver rail may be shorter, and the bolt handle may limit where the optic can sit. If the setup uses an external battery cable, the cable path also needs room.
Set the mount height for eye relief and cheek weld
Mount height controls how naturally your eye lines up with the display. A thermal scope does not use glass in the same way as a daytime riflescope, but eye position still affects comfort, field of view, and recoil safety.
Too low, and the shooter may press the cheek down hard or lose a full image. Too high, and the head may float above the stock. Both create inconsistent positions.
The goal is a repeatable cheek weld with the full display visible. If the rifle has an adjustable cheek riser, set it after the optic height is chosen. If the stock is fixed, choose the mount height with more care.
Eye relief also matters on centerfire rifles. A thermal scope with safe eye distance on a light-recoiling rifle may feel too close on a heavier cartridge. Always leave enough clearance for recoil and field positions.
Leave access to batteries, ports, controls, and the LRF
A mount should not block the parts of the optic used during a hunt. This is a common issue on thermal setups because battery compartments, charging ports, focus controls, lens covers, and LRF modules can sit near the mount area.
Before buying, check:
- Can the battery door open while mounted?
- Can the charging port be reached?
- Can the lens focus ring move freely?
- Can all buttons be used with gloves?
- Does the mount block the laser rangefinder module?
- Does the mount interfere with a sling, bolt handle, or charging handle?
If an external battery pack is part of the setup, plan the cable path before the first hunt. A cable that crosses the action, control area, or sling point can become annoying fast.
Which Mount Style Fits Your Hunting Setup?
The right mount style depends on how the rifle will be used. A dedicated night rifle, a shared optic, an AR-style predator rifle, and a heavier long-range thermal setup may all call for different hardware.
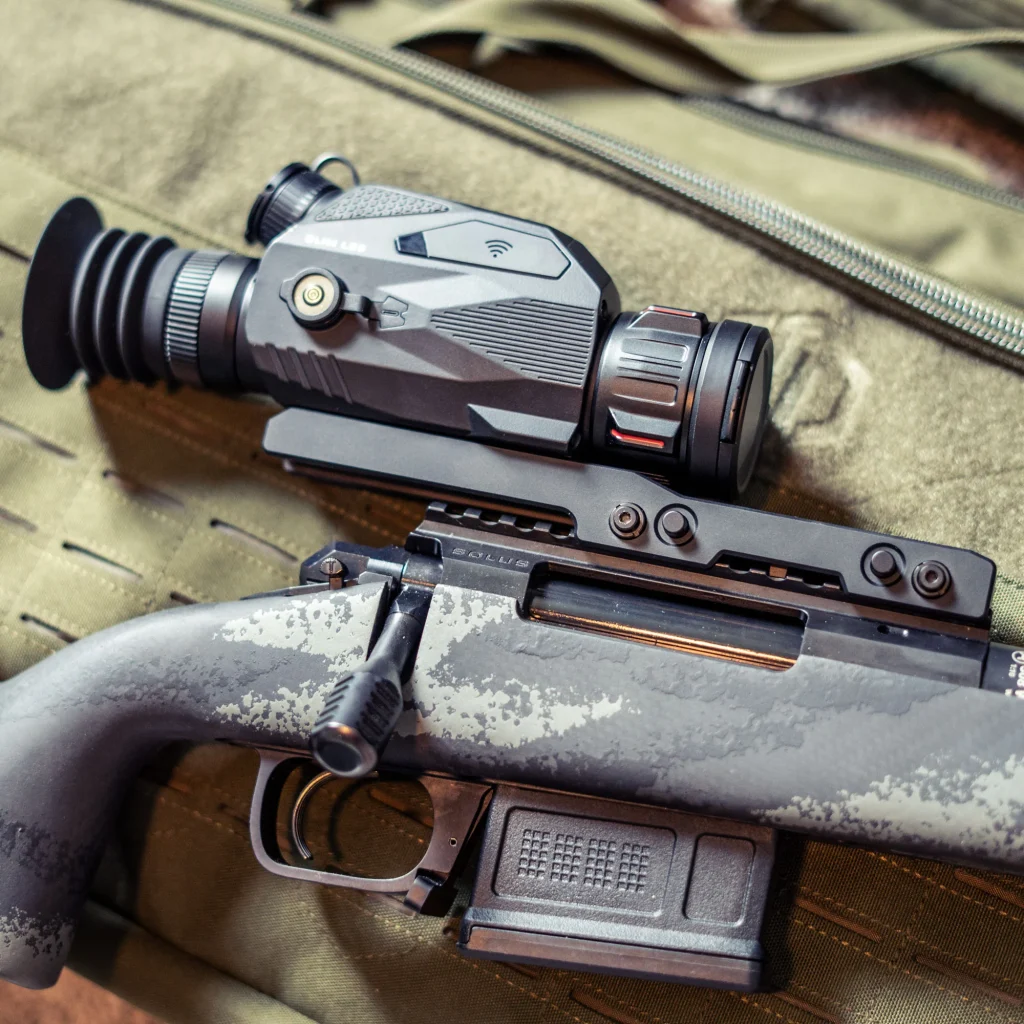
Fixed mounts for dedicated night rifles
A fixed mount is often the best fit for a rifle that keeps the same thermal scope all season. It keeps the setup simple and reduces the number of moving parts.
Choose a fixed mount when:
- The optic stays on one rifle.
- The rifle has a case that fits the mounted optic.
- Repeatability is more important than fast removal.
- The shooter does not need to switch optics often.
Fixed does not mean maintenance-free. The mount still needs correct tightening, zero confirmation, and periodic checks after recoil or transport.
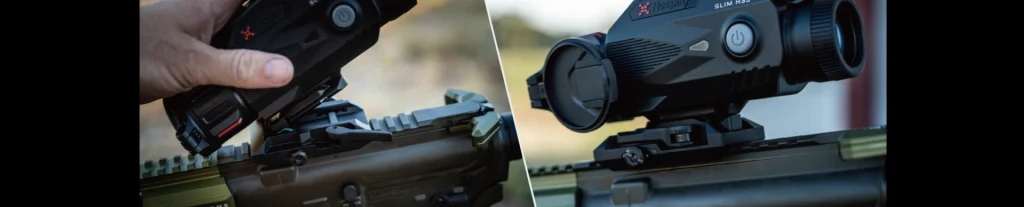
QD mounts for shared optics and transport
QD mounts make sense when the optic needs to come off the rifle. That may happen because the same thermal scope is shared between rifles, the rifle rides in a compact case, or the optic is removed for storage.
The buyer should look for repeatable lockup, a secure lever, and clear installation guidance. The mount should clamp with firm pressure without damaging the rail.
The key rule is simple: treat return-to-zero as a feature to verify, not a promise to assume. If the optic is removed and reinstalled, check zero before relying on the rifle.
Cantilever mounts for AR-style rifles
Cantilever mounts are common on AR-style rifles because they help place the optic forward while keeping the mount attached to the receiver rail. This can improve eye relief and leave room for charging handles, stocks, or rear accessories.
Use a cantilever mount only when it solves a real placement issue. Extra forward offset is not automatically better. Too much offset can make the rifle feel nose-heavy or place the display farther away than needed.
For thermal scopes with large bodies, check that the cantilever arm, objective housing, and controls have enough space.
Rings only when the scope is designed for rings
Do not buy thermal scope rings unless the optic is designed for ring mounting. A tube-shaped thermal scope may accept rings, but many thermal optics do not.
If rings are supported, match:
- Tube diameter.
- Ring height.
- Rail interface.
- Ring spacing.
- Recoil rating.
Avoid clamping rings on surfaces that are not meant for rings. Thermal housings can include sensors, electronics, batteries, and seals. The wrong pressure point can damage the optic or create alignment issues.
Heavier thermal scopes need stability first
Large thermal scopes need stable mounting before convenience features. Long objective lenses, integrated LRF modules, internal batteries, and metal bodies can add weight. That weight sits above the bore and moves under recoil.
For heavier setups, prioritize:
- Strong rail engagement.
- A mount body with enough contact area.
- Correct hardware tightening.
- A rifle base is installed well.
- A balanced position that does not fight the shooter.
QD may still work. Cantilever may still work. Rings may still work. The point is to choose the style that supports the optic under recoil instead of choosing by convenience alone.
What Should You Verify After Installing a Thermal Scope Mount?
After installation, verify the mount before calling the rifle ready. The final test is not whether the optic looks aligned on the bench. The final test is whether the rifle holds zero and remains usable in field positions.
Tighten to the manufacturer’s specs
Follow the mount and optic manufacturer’s instructions for screw order and torque. Do not invent torque values. Too loose can let the mount shift. Too tight can damage hardware, rails, or the optic.
Use the correct driver bit, tighten evenly, and mark screws only if the manufacturer or gunsmith recommends it. If the setup feels unclear, a qualified gunsmith is the safer choice.
Confirm eye relief and image position
Shoulder the rifle from normal hunting positions. Check the full display from standing, sitting, kneeling, and supported positions if those are part of your hunt.
The image should appear without stretching your neck or lifting your head off the stock. If the rifle has adjustable cheek support, tune it after the optic is mounted.
If the optic is new to the shooter, a broader guide on comment utiliser une lunette thermique can help with the setup habits that come after mounting, including focus, palettes, and basic field checks.
Zero the rifle after the mount is installed
Any new mount setup needs a fresh zero. Even if the same scope was previously zeroed, changing mounts can change the point of impact.
Use the optic’s zeroing method and a suitable thermal target. If you need a refresher, this guide on comment régler une lunette thermique explains the basic zeroing workflow.
Recheck after recoil, transport, or removal
Recheck zero after the rifle has been fired, transported, or stored with the optic attached. Recheck again if a QD mount has been removed and reinstalled.
Warning signs include:
- Groups are shifting after a few shots.
- The mount lever feels looser than before.
- Screws move from their original position.
- The optic image position changes.
- The rifle no longer groups where expected.
If any of those show up, stop treating it as a zeroing issue until the mount and rail are checked.
Dernière réflexion
A thermal scope mount should be chosen as part of the whole rifle system, not as a separate accessory. Match the rail, optic interface, height, eye relief, controls, and recoil needs first. Then confirm zero before the hunt.
For Nocpix users, compare the optic and mount details through the product page, local dealer, or support path, then use où acheter if you need a region-specific purchase route.
Frequently Asked Questions About Thermal Scope Mounts
Do all thermal scopes use standard rings?
No. Some thermal scopes use rings, but many use integrated bases, Picatinny mounts, proprietary shoes, or model-specific adapters. Check the exact optic interface before buying rings.
Can a Picatinny thermal scope mount fit a Weaver rail?
Sometimes, but not always. Picatinny and Weaver rails look similar, but slot width and spacing can differ. A mount listed for Picatinny only should not be assumed to fit a Weaver rail.
Should a thermal scope mount be quick detach or fixed?
Use a fixed mount when the thermal scope stays on one rifle. Use a QD mount when removal, transport, or optic sharing is part of the setup. Either way, confirm zero after installation and after removal.
Do you need to re-zero after changing a thermal scope mount?
Yes. A mount change can change point of impact. Zero the rifle after installing a new mount, and recheck zero after recoil, transport, or QD removal.