The fastest way to sight in a thermal scope is to fire one precise shot, move the reticle to the bullet impact using the scope’s digital zero function, and confirm the adjustment with a small shot group.
Thermal optics work differently from traditional rifle scopes because they detect heat instead of visible light. That difference changes how targets appear and how you approach the zeroing process.
In this guide, we’ll show you exactly how to sight in a thermal scope step by step. You’ll learn the fastest zeroing method, the best distances to start with, and which targets work best for thermal optics.

Innehållsförteckning
What Does It Mean to Sight In a Thermal Scope?
Sighting in a termiskt kikarsikte means adjusting the optic so the reticle lines up with where your bullet actually hits.
When your scope is properly zeroed, the point of aim (POA) and the point of impact (Sevärdhet) match.
Point Of Aim vs Point Of Impact
POA is the exact spot where the reticle sits when you fire the rifle.
POI is the location where the bullet actually strikes the target.
If the rifle is not zeroed, these two points will not match. Zeroing adjusts the reticle until the bullet impact lands exactly where you aim.
Why Thermal Scopes Feel Different From Traditional Rifle Scopes
Unlike traditional optics, thermal scopes detect heat instead of visible light. Because of that, targets appear as heat signatures rather than detailed shapes.
Many shooters notice this immediately during their first thermal sight-in. A paper target that looks perfect through a daytime optic may appear almost invisible through thermal.
That’s why thermal shooters often use heated or reflective targets when zeroing.
What Do You Need Before Zeroing a Thermal Scope?
Prepare a few basic items before you begin zeroing. A stable setup and a visible thermal target make the process faster and more accurate.
A Stable Shooting Rest
Use a stable shooting rest to remove as much movement as possible.
Good options include:
- Shooting benches
- Bipods
- Tripods
- Sandbags
The more stable the rifle is, the easier it becomes to see true bullet impact instead of small shooter errors.
The Same Ammo You Plan to Use in the Field
Always zero your rifle with the same ammunition you plan to hunt with.
Different bullet weights or velocities can shift the point of impact by several inches at longer distances. Using your hunting ammo during zeroing prevents unexpected changes later in the field.
A Clear Thermal Target
Thermal scopes detect temperature differences, so your target must produce a visible heat signature.
Common thermal targets include:
- Reflective foil tape on cardboard
- Hand warmers attached to a board
- Chemical heat pads
- Warm water bottles
- Dedicated thermal zeroing targets
A small heat source roughly 2–3 inches wide usually works best because it creates a precise aiming point.
A Clear Scope Display
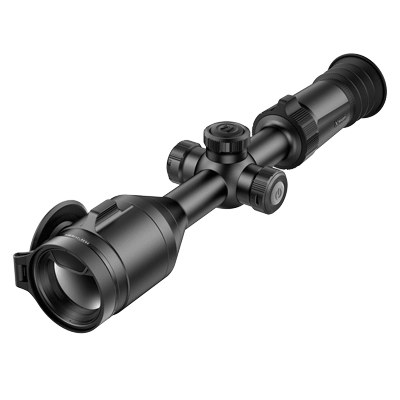
Adjust brightness, contrast, and color palette so the target stands out clearly. Many modern optics also include digital zeroing tools.
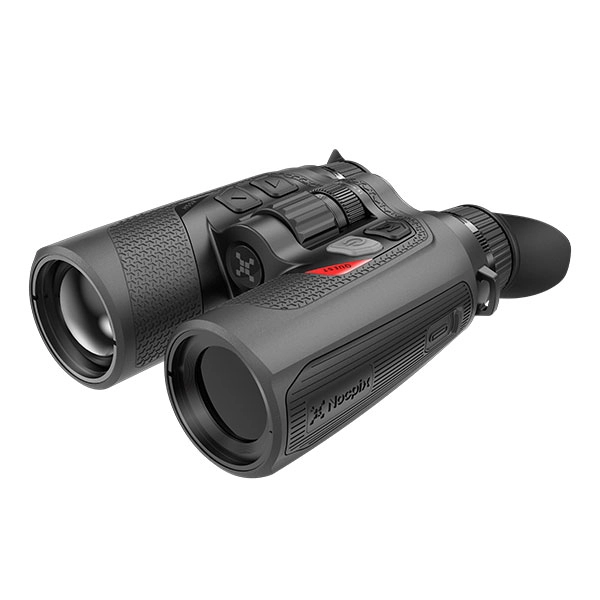
For example, models like the Nocpix BOLT-serien termisk omfattning allow you to freeze the image and move the reticle directly to the bullet impact, which speeds up the entire process.
What Is the Fastest Way to Zero a Thermal Scope?
The fastest method uses the one-shot zero technique built into most modern thermal optics. Instead of adjusting turrets repeatedly, you move the reticle directly to the bullet impact.
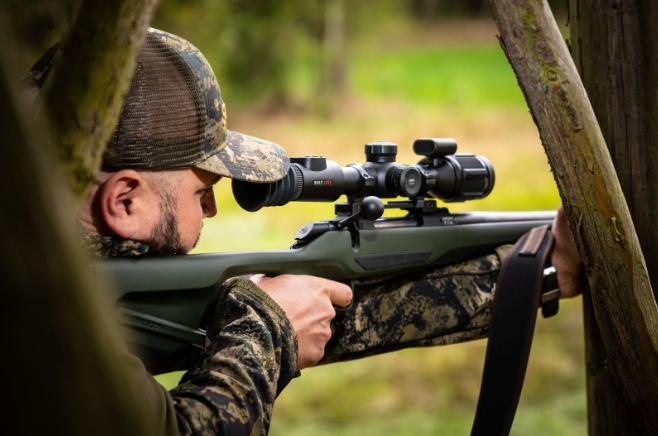
Fire One Careful Shot From a Solid Rest
Place the rifle on a stable rest and aim at the center of your thermal target. Fire one careful shot while keeping the rifle steady.
The goal is to create a clear bullet impact that you can easily identify through the scope.
Freeze the Image or Enter Zero Mode
Activate the scope’s zeroing mode after firing.
Many thermal scopes allow you to freeze the screen, which lets you study the bullet impact without moving the rifle.
Move the Reticle to the Bullet Impact
Keep the rifle pointed at the original aiming point. Then move the reticle until it sits directly over the bullet impact or heat signature.
You are adjusting the reticle position, not the rifle itself.
Save the Zero and Confirm It
Save the new zero setting in the scope menu. Then fire another shot to confirm the adjustment. If needed, make a small correction.
How Do You Confirm Your Thermal Scope Zero Is Correct?
Start zeroing a thermal scope at 25–30 yards, then confirm your final zero at 50 or 100 yards depending on your hunting distance.
Shoot A 3–5 Shot Group
A shorter distance makes it easier to locate the first bullet impact.
This step helps bring the reticle and impact point close together before moving to longer distances..
Check Point Of Impact Consistency
Once the rifle is hitting near the center, move the target back.
Most thermal hunters use:
- 50 yards for hog hunting or dense terrain
- 100 yards for open land or coyotes
Confirm At Your Final Hunting Distance
Your final zero should match your real shooting distances.
For example:
- En 50-yard zero reduces holdover errors for typical night hunting ranges.
- En 100-yard zero offers better flexibility for longer shots.
Simple Zero Distance Guide
| Zero Distance | Best Use | Advantage |
| 25–30 Yards | Initial Setup | Quickly find your first impact |
| 50 Yards | Short-Range Night Hunting | Minimizes error inside 75 yards |
| 100 Yards | Longer Shots | More flexibility for distance |
What Distance Should You Start Zeroing At?
Start zeroing a thermal scope at 25 to 30 yards, then confirm your final zero at 50 to 100 yards based on how you actually hunt. This method helps you get on paper faster, make cleaner adjustments, and reduce practical holdover error across common thermal shooting distances.
Start At 25 To 30 Yards To Get On Target Faster
Begin at 25 to 30 yards if you are mounting a new thermal scope or setting up a new rifle. This shorter distance makes it much easier to see your first impact and correct a scope that is several inches off. At this stage, the goal is not to finish your zero. The goal is to get the reticle and bullet impact close.
Confirm At 50 Or 100 Yards Based On Your Use
Move back to 50 or 100 yards once the rifle is hitting near center. For many hunters, this range gives the best balance between close-range accuracy and mid-range shot control. A 50-yard zero often works well for hogs, brush, and tighter night setups. A 100-yard zero usually fits more open ground and longer coyote shots.
Pick Your Final Zero Distance Based On Real Field Use
Choose your final zero based on your real shooting conditions, not just habit. If most of your shots happen inside 75 yards, a 50-yard zero usually makes more sense. If you often stretch shots farther, a 100-yard zero may fit better. In many setups, a final zero between 50 and 100 yards keeps real-world error smaller across the distances hunters use most often.
Simple Zero Distance Guide
| Zero Distance | Best Use | Main Advantage |
| 25–30 Yards | Initial Setup | Helps You Get On Target Fast |
| 50 Yards | Short-To-Mid Hunting Distances | Reduces Error At Common Night Hunting Ranges |
| 100 Yards | Mid-To-Longer Hunting Distances | Gives Better Flexibility For Longer Shots |
What Magnification Should You Use When Zeroing a Thermal Scope?
Use your thermal scope’s native base magnification for the main zero, then add a little digital zoom only if you need a cleaner view of the aiming point. That usually gives you the best mix of image clarity, field of view, and reticle control.
Use Base Magnification First
Use your thermal scope’s native base magnification when zeroing the rifle. Base magnification provides the clearest image and the widest field of view, which makes it easier to hold the reticle steady and locate your bullet impact.
Digital zoom enlarges the image by stretching pixels, so image clarity usually drops as magnification increases. That can make the target look grainy and exaggerate small rifle movements.
Start the zeroing process at base magnification to keep the image stable. If you need a clearer view of the aiming point, increase digital zoom slightly after your impacts are already close to center.
Avoid using heavy zoom during zeroing. A small zoom adjustment is usually enough for final precision.
When Digital Zoom Helps
Use digital zoom after you are already close to the center and need a more precise aiming reference. A small step up in zoom can help when the target is small or the thermal aiming point looks soft at distance. Many digital optics also allow magnification during the zeroing process, which helps with final refinement.
What Target Works Best for Thermal Scope Zeroing?
The best target for thermal scope zeroing is one that creates a clear, consistent heat contrast that your optic can easily detect. Because thermal scopes read temperature differences rather than visible shapes, normal paper targets often appear flat or invisible. A good thermal target gives you a small, bright aiming point so you can see both the reticle and the bullet impact clearly.
Dedicated Thermal Targets
Dedicated thermal zeroing targets are one of the most reliable options. These targets are designed to create a clear heat signature that thermal optics can detect easily. Some use heat-reflective materials, while others include small heating elements.
It is important to remember that zeroing targets should never be live animals. Using animals as a heat source for sight-in is unsafe and unethical. Instead, use purpose-built thermal targets or other controlled heat sources that provide a safe and stable aiming point.
Foil Tape Or Reflective Patches
Foil tape or reflective patches placed on a cardboard or paper target work well with thermal scopes. These materials reflect ambient heat and often appear brighter through thermal optics than standard paper. A small square of foil tape in the center of the target can create a clear aiming point.
Hand Warmers, Heat Pads, And Water Bottles
Simple heat sources are another popular option. Many shooters attach a hand warmer or small heat pad to the center of a target board. Others use a bottle filled with warm water to create a visible heat spot. These solutions produce a strong heat signature that makes the target easy to see through the thermal scope.
Why Is Your Thermal Scope Still Shooting Off After Zeroing?
A thermal scope can still shoot off target after zeroing if the rifle setup, ammunition, target visibility, or confirmation process was not consistent. Even a small change in mounting, ammo, or shooting position can shift the point of impact.
Loose Mounts Or Setup Issues
Check the scope mount and rail first. If the mount is not tightened properly, the optic can shift slightly after recoil. Even a small movement between shots will change the point of impact. Make sure the mount screws and rail system are secure before rechecking your zero.
Different Ammo Or Different Rifle Settings
Changing ammunition can move your bullet impact. Different bullet weights, velocities, or brands often produce different trajectories. If you zero with one type of ammo but hunt with another, the rifle may shoot several inches off target.
Poor Target Contrast
Thermal optics rely on heat contrast. If the target does not produce a strong heat signature, it becomes difficult to see the exact aiming point or bullet impact. A weak thermal target can lead to inaccurate adjustments during the zeroing process.
No Final Group Confirmation
One shot is not enough to confirm a zero. Always fire a small group after making adjustments. A tight group centered on the target shows that the rifle, scope, and ammo are working together consistently.
Heavy Zoom Or Rushed Corrections
Using excessive digital zoom or adjusting the reticle too quickly can lead to overcorrection. Start with base magnification and make small adjustments after each group to keep the zero stable.
Common Zeroing Mistakes
Even experienced shooters sometimes struggle with thermal scope zeroing. Small setup errors can easily shift your point of impact and make the process frustrating.
Here are some of the most common mistakes to avoid.
i) Using A Target That Is Too Large
Thermal zeroing works best with a small heat source. A large warm target makes it difficult to identify the exact aiming point.
Most shooters get better results using a 2–3 inch heat signature, such as a hand warmer or foil patch.
ii) Zeroing With Too Much Digital Zoom
Heavy digital zoom reduces image clarity and exaggerates rifle movement. This often causes shooters to chase the reticle and overcorrect adjustments.
Start with base magnification and only add a small amount of zoom if needed.
iii) Skipping The Confirmation Group
Some shooters stop after the first successful adjustment. However, one accurate shot does not confirm a stable zero.
Always fire a 3-shot or 5-shot group to verify that the rifle, ammo, and optic are working together consistently.
iv) Changing Ammo After Zeroing
Different ammunition types can shift bullet impact significantly. If you zero with one load but hunt with another, your rifle may shoot several inches off target.
v) Ignoring Loose Mounts
A slightly loose scope mount can shift under recoil and change your zero. Always check rail screws and mount torque before starting the zeroing process.
Slutsats
Sighting in a thermal scope becomes much easier when you follow a simple process. Start with a stable shooting rest, use a visible heat target, zero at a short distance, and confirm the result with a small shot group.
Once everything lines up, your rifle will place shots exactly where the reticle sits—whether you are testing gear during the day or hunting at night.
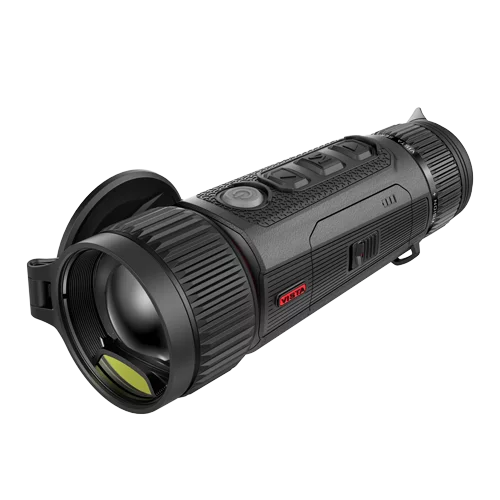
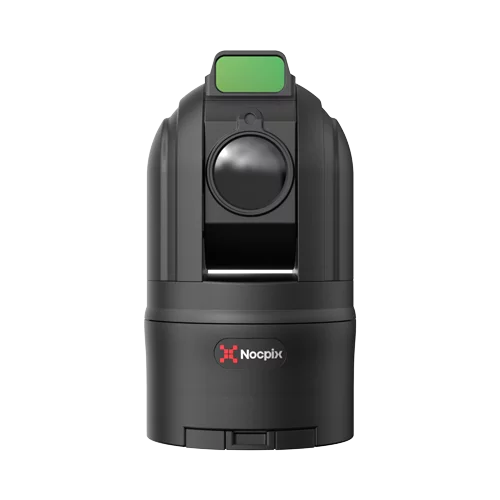
If you want a smoother zeroing experience, modern optics with digital zero tools make the process much faster. You can explore options like the Nocpix termiska skop for precise controls, clear imaging, and easier sight-in before your next hunt.
Vanliga frågor
Can you sight in a thermal scope without a special target?
Yes, you can sight in a thermal scope without a dedicated thermal target as long as the target creates a clear heat contrast. Many shooters use simple solutions like foil tape, hand warmers, heat pads, or a bottle filled with warm water attached to a cardboard board. The key requirement is a small, visible heat signature that stands out clearly through the thermal optic.
When Should You Re-Zero a Thermal Scope?
Re-zero a thermal scope whenever something in your setup changes. Common situations include mounting the scope on a different rifle, switching to a different type of ammunition, adjusting the scope mount, or taking a hard impact during transport. Many hunters also confirm their zero before the start of a new season to make sure the rifle still shoots accurately.
Can You Zero a Thermal Scope During the Day?
Yes, thermal scopes work during the day because they detect heat rather than visible light. The main challenge is target visibility. In daylight, temperature differences between objects can be smaller, so you may need a stronger heat source such as a hand warmer or heat pad to create a clear aiming point.
How many shots does it take to zero a thermal scope?
Most thermal scopes can be zeroed in about 3 to 5 shots when using the one-shot zero method. After the first shot, you move the reticle to the bullet impact using the scope’s zeroing function. Then shoot a small group to confirm the adjustment and make any minor corrections if needed.